


Have you ever had trouble running an application on your local machine during development because of your application have complex dependency? Or perhaps you need technology to easily run your application on multiple computers (usually used in the development and testing process)? Docker container technology might be an alternative solution for you. So here is the easy way to run application using Docker.
Docker Container
Docker container is a lightweight, portable, and self-sufficient environment that packages an application along with all the necessary dependencies, libraries, and configuration files it needs to run. It enables you to run your application consistently across different environments, making development and deployment more efficient. By sharing the host system’s operating system kernel, containers start faster and use fewer resources compared to traditional virtual machines. Each container runs in isolation, reducing the risk of conflicts or crashes between applications. To simplify the management of containers and images, Docker provides Docker Desktop, a user-friendly application for Windows and macOS that includes Docker Engine, a GUI dashboard, and tools like Docker Compose. Docker Desktop makes it easy for developers to build, run, and monitor containers locally before deploying them to production environments.
Docker Installation
There are several ways to install Docker, but this time I will explain the easiest way to install it, yes, using Docker Desktop. However, in my implementation, I’ll be using Docker syntax more because I’m more familiar with it, but for some case, I usually using the GUI of Docker Desktop to use it features like start – stop service and monitoring the container. If you’re more comfortable with the UI, you can learn more about Docker Desktop. Here the steps to install it:
- Follow this link and download Docker Desktop installer. Choose the correct installer based on your OS. It provides installer for Windows, MacOS, and Linux. For my case, i use MacOS, so I choose it and download in .dmg extension.
- After download installer, install it and follow the instruction. It’s a common installation process, and a clear instruction there. You can follow it.
- After finish, let’s move to the next steps!
Running Application Over Docker
Let’s going to the real part of our topic, yes, running the application over Docker. To run the application over Docker in your local machine, there is the most important part you must have, it called docker-compose.yml . What is it? The docker-compose.yml file is a configuration file used by Docker Compose to define and manage multi-container Docker applications. It allows you to describe the services, networks, and volumes required for your application in a single, easy-to-read YAML file. With docker-compose.yml, you can specify details such as the Docker images to use, environment variables, port mappings, and dependencies between services. This makes it simple to run complex applications with just one command. By using Docker Compose and this file, developers can streamline development, testing, and deployment processes, ensuring consistency across environments and reducing setup time.
Create Working Folder
First of all, for using Docker you need to create your working folder first. In my case, I create working folder named “programmermumet”. I put my docker-compose.yml here in this folder.
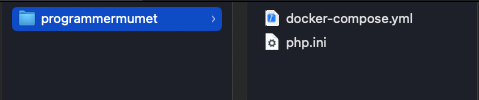
docker-compose.yml
Here is the sample of docker-compose.yml:
version: '3.8'  # Specify the Docker Compose file format version

services:  # Define the services that make up the application

  wordpress:  # Define the WordPress service
    image: wordpress:6.8.1  # Use the official WordPress image version 6.8.1
    ports:
      - "8000:80"  # Map port 8000 on the host to port 80 in the container
    environment:  # Define environment variables for WordPress configuration
      WORDPRESS_DB_HOST: db:3306  # Hostname and port of the MySQL database service
      WORDPRESS_DB_USER: wordpress  # Database username
      WORDPRESS_DB_PASSWORD: wordpress  # Database password
      WORDPRESS_DB_NAME: wordpress  # Name of the WordPress database
    volumes:
      - wordpress_data:/var/www/html  # Persist WordPress files using a named volume
      - ./php.ini:/usr/local/etc/php/conf.d/custom.ini  # Mount a custom PHP configuration file
    depends_on:
      - db  # Ensure the database service starts before WordPress

  db:  # Define the MySQL database service
    image: mysql:8  # Use the official MySQL image version 8
    environment:  # Define environment variables for MySQL configuration
      MYSQL_DATABASE: wordpress  # Name of the default database to create
      MYSQL_USER: wordpress  # MySQL user to create
      MYSQL_PASSWORD: wordpress  # Password for the MySQL user
      MYSQL_ROOT_PASSWORD: rootpassword  # Root password for MySQL
    volumes:
      - db_data:/var/lib/mysql  # Persist MySQL data using a named volume

volumes:  # Define named volumes for persistent storage
  wordpress_data:  # Volume for WordPress files
  db_data:  # Volume for MySQL database files
In my case, I try to run wordpress over the Docker Container. I put all of the dependency on docker-compose.yml. For the function of each line I already put on the code above, you can analyze from there. For other purpose, you can adjust docker-compose.yml based on your application dependencies. Maybe I will describe more about detail of this docker-compose.yml in other post.
Execute Docker Compose
After set up docker-compose.yml based on your application needs, the next step is to running the docker compose. Here the steps:
- Open terminal and enter to the working folder. In my case I enter to programmermumet folder.
cd /Users/mymac/Documents/programmermumet - Execute docker compose
docker-compose up -d- This syntax can be works if you have installed docker-compose before or it embedded in Docker Desktop that you have been installed before. If you haven’t installed it, then install it first to be able to use it. You can install it over brew (for MacOS) or over your familiar package manager based on your OS.
brew install docker-compose- After your docker-compose installed, you can running the syntax.
- Wait until the process finish and you can open your application. In my case, I can open my application in my browser by open http://localhost:8000 . The port is depended on your configuration on docker-compose.yml.
- Thats all, enjoy…
Conclusion
It’s very simple to running your application over Docker Container. This can be alternative for you who need easy ways to running project or application that have complex dependency.
For more information about technology you can follow our page.